threejs系列-初探
完整的 three app 结构

Renderer 中包含 Camera 和 Scence,这个很好理解,可以想象成一个片场,Scene 就是舞台,Camera 就是摄像机。上图中用蓝色框圈起来的部分就是 Scene Graph。
Scene Graph(场景图) – threejs 的核心概念

一个 Scene Graph 中包含各种各样的对象,比如场景对象、网状对象、光线对象、组、镜头。
Scene 对象定义 Scene Graph 的根,并包含背景颜色和雾等属性。这些对象定义了一个分层的父/子树状结构,并表示对象出现的位置以及它们的方向。
每个子对象的定位和方向都与父对象相关。
Camera
注意看图 1,Camera 是 scenegraph 的一半,也就是说 Camera 和其他的对象类型不一样,区别在于,Camera 不一定非得出现在 scenegraph 中,而与其他对象类型相同的地方在于他的移动和方向都和他的父对象相关。
Mesh
Mesh 由 Geometry 和 Material 组成。两个 Mesh 对象可以引用相同的 Geometry 对象和相同的 Material 对象。
Geometry
Geometry 表示一些几何体的顶点数据,比如: sphere, cube, plane, dog, cat, human, tree, building。。。threejs 内建了多种 geometry可参考。
Material
代表 Geometry 的材质,比如光泽程度和颜色。一个 Material 对象也可以使用多个 Texture 对象,比如可以给一个 geometry 贴图。
Texture
纹理对象通常表示从图像文件加载、从画布生成或从另一个场景渲染的图像。
Light
代表了不同的光,将在之后展开。
小型实践
准备工作
- 引入库
yarn add threejs- 写相关代码
在 html 中
<html>
    <head>
        <meta name="viewport" content="width=device-width, initial-scale=1" />
        <meta charset="UTF-8" />
        <script type="importmap">
            {
                "imports": {
                    "three": "../node_modules/three/src/Three.js"
                }
            }
        </script>
        <script type="module">
            import * as THREE from 'three'
            const scene = new THREE.Scene()
            window.THREE = THREE
        </script>
        <script type="text/javascript" src="./index.js" defer></script>
    </head>

    <body>
        <canvas id="c"></canvas>
    </body>
</html>
创建 renderer
index.js
function main() {
    const THREE = window.THREE
    const canvas = document.querySelector('#c')
    const renderer = new THREE.WebGLRenderer({ canvas })
}

main()
以上,就创建了一个 webgl 渲染器,这个渲染器负责获取所有的数据,并将它们渲染到画布上。
注意这里的细节:如果没有把 canvas 给 threejs,threejs 会自己创建一个 canvas 插入到文档中。但这并不太灵活,所以最好自己创建一个,因为可以自定义样式。
创建 camera
创建一个 PerspectiveCamera(透视相机?)
const createCamera = () => {
    const fov = 75
    const aspect = 2 // the canvas default
    const near = 0.1
    const far = 5
    const camera = new THREE.PerspectiveCamera(fov, aspect, near, far)
    return camera
}
参数说明
fov 是视野的缩写。在此例中,垂直方向为 75 度。请注意,three.js 中的大多数角度都以弧度为单位,但出于某种原因,透视相机采用度数。
aspect 是画布的宽高比。我们将在另一篇文章中详细介绍,但默认情况下画布为 300x150 像素,这使得宽高比为 300/150 或者说是 2。
near 和 far 表示相机的近平面和远平面。它们限制了摄像机面朝方向的可绘区域。 任何距离小于或超过这个范围的物体都将被裁剪掉(不绘制)。
这四个参数定义了一个 “视椎(frustum)”。 视椎(frustum)是指一个像被削去顶部的金字塔形状。换句话说,可以把”视椎(frustum)”想象成其他三维形状如球体、立方体、棱柱体、截椎体。

近平面和远平面的高度由视野范围决定,宽度由视野范围和宽高比决定。
相机的定位
相机默认定位在原点,按下图推动 z 轴到+2 的位置(因为物体在原点,相机在原点也会看不到内部)

旋转
渲染循环函数 Window.requestAnimationFrame
function render(time) {
    time *= 0.001 // 将时间单位变为秒

    mesh.rotation.x = time
    mesh.rotation.y = time

    renderer.render(scene, camera)

    requestAnimationFrame(render)
}
requestAnimationFrame(render)
光照
平行光
不同的材质,反射出来的光不同,默认材质为 MeshBasicMaterial,这里改成 MeshPhongMaterial ,这种材质会受到光照影响。
const createLight = () => {
const color = 0xffffff
const intensity = 1
const light = new THREE.DirectionalLight(color, intensity)
return light
}
// ...
const light = createLight()
light.position.set(-1, 2, 4)
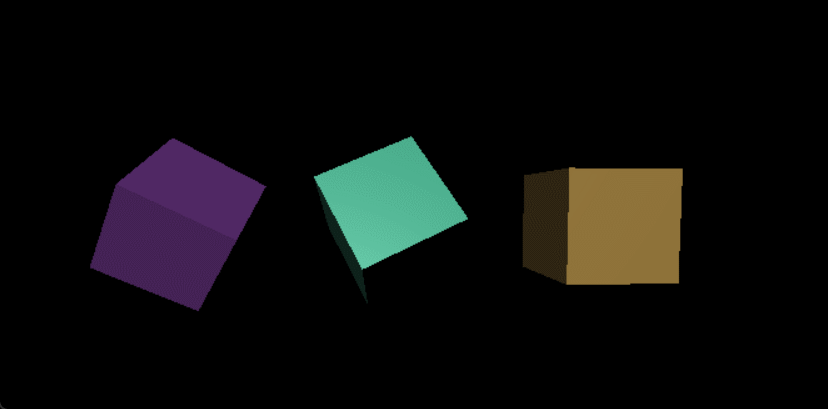
scene.add(light)添加多个物体
创建多个 mesh
const meshes = [createMesh(), createMesh(0x8844aa, -2), createMesh(0xaa8844, 2)]

meshes.forEach((mesh) => {
    scene.add(mesh)
})
更新旋转
function render(time) {
    time *= 0.001 // 将时间单位变为秒

    meshes.forEach((mesh, ndx) => {
        const speed = 1 + ndx * 0.1
        const rot = time * speed
        mesh.rotation.x = rot
        mesh.rotation.y = rot
    })

    renderer.render(scene, camera)

    requestAnimationFrame(render)
}
requestAnimationFrame(render)
很简单,多个 mesh 和单个 mesh 处理一样,遍历就 ok 了,threejs 也没有多余的 api,非常不错!
参考
https://threejs.org/docs/index.html#manual/zh/introduction/Creating-a-scene
https://threejs.org/manual/#zh/fundamentals