使用konva-react实现在线制图应用踩坑记录
前言
公司要做一个在线制图的东西,这个需求砸到我身上时真的想哭,还好老天帮我,发现了 konva,官方文档也非常良心,不仅描述清晰,也有在线的示例,直接上手开发还是非常方便的。
所以我们拆解需求,一点一点来吧!
图片、元素
在线制图最基础的应用是拖拽元素,比如,在画布上拖拽一张图片或某种形状,对该图片进行缩放或旋转操作。
画布就是<Stage>,每个图层为<Layer>。
拖拽元素
konva 中内置了很多形状的元素,比如圆形、矩形等,以下示例为“星型”,这里先用<Star>试一下:
import { Circle, Rect, Stage, Layer, Text, Star } from 'react-konva'
import Konva from 'konva'

const Shape = () => {
    const [star, setStar] = useState({
        x: 300,
        y: 300,
        rotation: 20,
        isDragging: false,
    })

    const handleDragStart = () => {
        setStar({
            ...star,
            isDragging: true,
        })
    }

    const handleDragEnd = (e: any) => {
        setStar({
            ...star,
            x: e.target.x(),
            y: e.target.y(),
            isDragging: false,
        })
    }

    return (
        <Stage width={1000} height={600}>
            <Layer>
                <Star
                    key="starid"
                    id="starid"
                    x={star.x}
                    y={star.y}
                    numPoints={5}
                    innerRadius={20}
                    outerRadius={40}
                    fill="#89b717"
                    opacity={0.8}
                    draggable
                    rotation={star.rotation}
                    shadowColor="black"
                    shadowBlur={10}
                    shadowOpacity={0.6}
                    shadowOffsetX={star.isDragging ? 10 : 5}
                    shadowOffsetY={star.isDragging ? 10 : 5}
                    scaleX={star.isDragging ? 1.2 : 1}
                    scaleY={star.isDragging ? 1.2 : 1}
                    onDragStart={handleDragStart}
                    onDragEnd={handleDragEnd}
                />
            </Layer>
        </Stage>
    )
}
其中,可以给 Star 配置一些基础的属性,如:x、y 指该元素在画布上的坐标位置,rotaition 指元素的旋转角度;fill 指元素的填充颜色,scaleX、scaleY 指元素在 x、y 轴上的放大比例等等。
在拖拽的时候,我们要给该元素添加一些拖拽事件,如上:添加 handleDragStart 更改isDragging属性,使其在拖动时产生形变;添加 onDragEnd 事件,更改isDragging和 x、y 属性,来改变拖动位置,关闭拖动形变特效等。
观察上面的代码发现某些属性和”react-dnd”类似,但在使用 drag 事件的时候,发现比 react-dnd 方便很多,可能因为底层是 canvas 的原因吧!
导入图片
有两种方式可以导入图片,一个是用 react-hooks,一个是调用 react 生命周期函数,这里为了图省事,用 hooks:
先安装 konva 的官方库use-image,之后我们来封装一下图片组件:
import { Image } from 'react-konva'
import useImage from 'use-image'

const KonvaImage = ({ url = '' }) => {
    const [image] = useImage(url)

    return <Image image={image} />
}

export default KonvaImage
变形
使元素变形,需要引用 konva 的Transformer组件,该组件可以使元素的缩放、旋转。如下代码,在选中某元素后,会展示 Transformer 组件,在该组件上存在boundBoxFunc属性,当用户触发元素的变形行为时,该函数会被调用,返回一个包含形变后元素的信息(下面代码中为 newBox)。
import React, { useState, useEffect, useRef } from 'react'
import { Image, Transformer } from 'react-konva'
import Konva from 'konva'
import useImage from 'use-image'

const KonvaImage = ({ url = '', isSelected = false }) => {
    const [image] = useImage(url)
    const imgRef = useRef()
    const trRef = useRef()

    useEffect(() => {
        if (isSelected) {
            trRef.current.nodes([imgRef.current])
            trRef.current.getLayer().batchDraw()
        }
    }, [isSelected])
    return (
        <>
            <Image image={image} draggable ref={imgRef} />
            {isSelected && (
                <Transformer
                    ref={trRef}
                    boundBoxFunc={(oldBox, newBox) => {
                        // limit resize
                        if (newBox.width < 5 || newBox.height < 5) {
                            return oldBox
                        }
                        const { width, height } = newBox
                        // console.log('width', width);
                        // console.log('height', height);
                        return newBox
                    }}
                />
            )}
        </>
    )
}

export default KonvaImage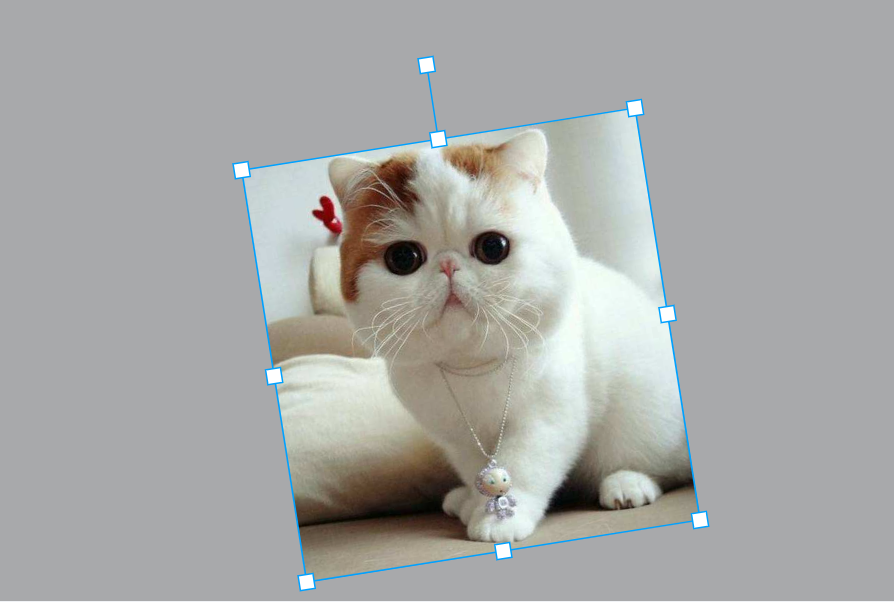
合成图片
在 Stage 上添加 ref,会把画布输出 base64,之后转为图片在浏览器中触发下载行为。
function downloadURI(uri: string, name: string) {
  var link = document.createElement('a');
  link.download = name;
  link.href = uri;
  document.body.appendChild(link);
  link.click();
  document.body.removeChild(link);
}

  const exportToImage = () => {
    const uri = stageRef.current.toDataURL();
    downloadURI(uri, 'stage.png');
  };

....
      <button onClick={exportToImage}>export</button>
      <Stage width={1200} height={1000} ref={stageRef}>
这里,注意图片的跨域问题,如果图片地址跨域了,图片的 konva 组件不会显示,所以要给图片服务器设置下 cors 头,或是中间做一层转发。并且要在代码层添加 crossorigin 属性开启 cors。否则就会在 canvas 的 toBlob()、toDataURL()和 getImageData()上报错。
图片跨域设置
konva 封装好的use-image提供好了跨域属性,如下
import useImage from 'use-image'

const [image, status] = useImage(url, 'anonymous')

<Image image={image} />
如果仍显示跨域问题不能生成图片,需要在服务器端添加跨域头或者做一层转发了。
字体
hoc 抽取共用部分
我们学习了字体和图片元素,会发现其中有一些功能是相同的,比如:Transformer、拖拽、选择等。为了后期方便维护,使用 hoc 来抽离这些功能。
const withTransform = (Component: FC) => {
    const Inner = (props: {
        isSelected: boolean
        handleInfo: (a: any) => void
        handleSelected: () => void
        rotation?: number
        opacity?: number
    }) => {
        const {
            isSelected = false,
            handleInfo = () => {},
            rotation = 1,
            opacity = 0.8,
            handleSelected,
        } = props

        const [info, setInfo] = useState({
            x: 100,
            y: 100,
            isDragging: false,
        })
        const eleRef = useRef()
        const trRef = useRef()

        useEffect(() => {
            if (isSelected && trRef) {
                // @ts-ignore
                trRef.current.nodes([eleRef.current])
                // @ts-ignore
                trRef.current.getLayer().batchDraw()
            }
        }, [isSelected])

        const handleDragStart = () => {
            handleSelected()
            setInfo({
                ...info,
                isDragging: true,
            })
        }

        const handleDragEnd = (e: any) => {
            setInfo({
                ...info,
                x: e.target.x(),
                y: e.target.y(),
                isDragging: false,
            })
        }

        return (
            <>
                {/* @ts-ignore */}
                <Component
                    // @ts-ignore
                    onDragStart={handleDragStart}
                    onDragEnd={handleDragEnd}
                    shadowColor="black"
                    shadowBlur={10}
                    shadowOpacity={0.6}
                    shadowOffsetX={info.isDragging ? 10 : 5}
                    shadowOffsetY={info.isDragging ? 10 : 5}
                    scaleX={info.isDragging ? 1.2 : 1}
                    scaleY={info.isDragging ? 1.2 : 1}
                    opacity={opacity}
                    draggable
                    // rotation={info.rotation}
                    ref={eleRef}
                    myRef={eleRef}
                    onClick={handleSelected}
                    {...props}
                />
                {isSelected && (
                    <Transformer
                        // @ts-ignore
                        ref={trRef}
                        boundBoxFunc={(oldBox, newBox) => {
                            if (newBox.width < 5 || newBox.height < 5) {
                                return oldBox
                            }
                            const { width, height } = newBox
                            // @ts-ignore
                            // setInfo(newBox);
                            //  handleChange(newBox);
                            return newBox
                        }}
                    />
                )}
            </>
        )
    }
    return Inner
}
在 Image 组件中,只需绑定好 props 就 ok 了
const KonvaImage = ({ url = '', handleSelected = () => {}, ...props }) => {
    const [image, status] = useImage(url, 'anonymous')
    return myRef ? (
        // @ts-ignore
        <Image
            image={image}
            draggable
            ref={props.myRef}
            onClick={handleSelected}
            {...props}
        />
    ) : null
}
在画布上,只需这样使用
import MyImage from './KonvaImg'
const KonvaImage = withTransform(MyImage)

// ...
<KonvaImage
    url={i.value}
    isSelected={i.id === selectedId}
    handleInfo={handleInfo}
    handleSelected={setSelected.bind(null, i.id)}
/>
当然我们封装好的 hoc,在下一节处理字体组件的时候,就无需关系拖拽、选择和变形的相关逻辑了。
用上面的 hoc,包裹下 Text 组件
const KonvaText = withTransform(MyText)
// ...
<KonvaText
    // @ts-ignore
    stageRef={stageRef}
    isSelected={i.id === selectedId}
    handleSelected={setSelected.bind(null, i.id)}
/>
效果如下
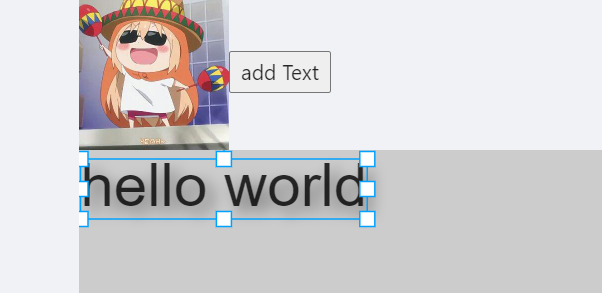
双击修改文本
现在组件已经可以拖拽和变形了,文字组件还要让用户输入,修改其上的文本。由于在 canvas 上不好实现这种效果,所以在全局生成一个 textarea 框,把画布上的文本中的坐标位置和宽高写到 textarea 上。这部分不太好做,从官网上正好找到示例代码,我们改造下:
const KonvaText: FC<ItextInfo> = ({
    stageRef,
    myRef,
    setShowTransformer,
    handleSelected,
    ...props
}) => {
    const [showText, setShowText] = useState(true)
    const onDblClick = (e: any) => {
        const textNode = e.target

        const textPosition = textNode.getAbsolutePosition()
        const stageBox = stageRef.current.container().getBoundingClientRect()

        const areaPosition = {
            x: stageBox.left + textPosition.x,
            y: stageBox.top + textPosition.y,
        }

        setShowText(false)
        const textarea = document.createElement('textarea')
        if (setShowTransformer) {
            setShowTransformer(false)
        }
        document.body.appendChild(textarea)
        textarea.value = textNode.text()
        textarea.style.position = 'absolute'
        textarea.style.top = areaPosition.y + 'px'
        textarea.style.left = areaPosition.x + 'px'
        textarea.style.width = textNode.width() - textNode.padding() * 2 + 'px'
        textarea.style.height =
            textNode.height() - textNode.padding() * 2 + 5 + 'px'
        textarea.style.fontSize = textNode.fontSize() + 'px'
        textarea.style.border = 'none'
        textarea.style.padding = '0px'
        textarea.style.margin = '0px'
        textarea.style.overflow = 'hidden'
        textarea.style.background = 'none'
        textarea.style.outline = 'none'
        textarea.style.resize = 'none'
        textarea.style.lineHeight = textNode.lineHeight()
        textarea.style.fontFamily = textNode.fontFamily()
        textarea.style.transformOrigin = 'left top'
        textarea.style.textAlign = textNode.align()
        textarea.style.color = textNode.fill()

        let rotation = textNode.rotation()
        let transform = ''
        if (rotation) {
            transform += 'rotateZ(' + rotation + 'deg)'
        }

        let px = 0
        const isFirefox =
            navigator.userAgent.toLowerCase().indexOf('firefox') > -1
        if (isFirefox) {
            px += 2 + Math.round(textNode.fontSize() / 20)
        }
        transform += 'translateY(-' + px + 'px)'
        textarea.style.transform = transform
        textarea.style.height = 'auto'
        textarea.style.height = textarea.scrollHeight + 3 + 'px'

        textarea.focus()

        function removeTextarea() {
            try {
                if (textarea) {
                    console.log(textarea)
                    document.body.removeChild(textarea)
                    setShowText(true)
                }
            } catch (err) {
                console.log(err)
            }
        }

        function setTextareaWidth(newWidth: number) {
            if (!newWidth) {
                // set width for placeholder
                newWidth = textNode.placeholder.length * textNode.fontSize()
            }
            // some extra fixes on different browsers
            const isSafari = /^((?!chrome|android).)*safari/i.test(
                navigator.userAgent
            )
            const isFirefox =
                navigator.userAgent.toLowerCase().indexOf('firefox') > -1
            if (isSafari || isFirefox) {
                newWidth = Math.ceil(newWidth)
            }
            const isEdge =
                document.documentMode || /Edge/.test(navigator.userAgent)
            if (isEdge) {
                newWidth += 1
            }
            textarea.style.width = newWidth + 'px'
        }

        textarea.addEventListener('keydown', function (e: any) {
            if (setShowTransformer) {
                setShowTransformer(false)
            }
            if (e.keyCode === 27) {
                removeTextarea()
            }

            const scale = textNode.getAbsoluteScale().x
            setTextareaWidth(textNode.width() * scale)
            textarea.style.height = 'auto'
            textarea.style.height =
                textarea.scrollHeight + textNode.fontSize() + 'px'
        })

        textarea.addEventListener('blur', function () {
            if (e.target !== textarea) {
                textNode.text(textarea.value) //  注意这里
                removeTextarea()
            }
        })
    }

    return (
        <>
            {showText && (
                <Text
                    text={props.value}
                    ref={myRef}
                    onDblClick={onDblClick}
                    onClick={() => {
                        setShowTransformer(true)
                        handleSelected()
                    }}
                    fontSize={40}
                    {...props}
                />
            )}
        </>
    )
}
最终效果如上,发现已经可以成功编辑了,但是当光标移出 textarea 的时候,字体又还原回之前的位置了,明明照着官网代码改的,为什么不一样呢?这是因为没有把已经改变的数据传入 Text 组件中,画布中的数据没有和子组件进行关联
<Text
    text={props.value} // 注意这里
    {...props} // 注意这里
    // ....
/>
现在的文本和一些位置信息还是之前的 props,所以接下来我们在画布组件中绑定下数据
<Stage width={width} height={height} ref={stageRef}>
    {infos.map((i: Iinfo, idx: number) => (
        <Layer key={i.id}>
            <KonvaText
                {...i}
                stageRef={stageRef}
                isSelected={i.id === selectedId}
                handleInfo={handleInfo.bind(null, idx)}
                handleSelected={setSelected.bind(null, i.id)}
            />
        </Layer>
    ))}
</Stage>
这里的 info 存储的就是每个子组件被编辑的信息,如元素的坐标、宽高、透明度、字体的文本等等。。
因为这里面包含不少冗余信息,可以在 hoc 中过滤掉一些不需要的 props 或者在最后保存的时候做一次性的过滤。
字体的样式修改
比如字体的对齐、加粗、斜体等等
<Text
    // ...
    fontStyle="italic bold"
    align="center"
/>
最终效果为
原生 konva 与 react-konva 中的不同点(坑)
在上面双击修改文本的示例中,发现使用 state 驱动数据变化从而引起 Text 和 Transformer 组件引起变化,会使某些功能失效,比如,我们在键入文本改变了 Text 长度的时候,Transformer 组件并没有随其动态改变宽高。
这里的解决方法是,使用 state 去驱动 ref,调用 ref.current 上的 konva 方法.
如果使用 state 控制一个元素的显示与隐藏,如下:
useEffect(() => {
    if (trRef) {
        const tr = trRef.current
        if (isSelected && showTransformer) {
            tr.show()
            tr.forceUpdate()
        } else {
            tr.hide()
        }
    }
}, [isSelected, showTransformer, trRef])
效果如下:
总之,在 react-konva 中控制元素的显隐,一定不能用 state 直接绑到视图层!!
字体修改
和上面修改样式一样,我们只要改变fontFamily属性就可以修改Text的字体了。(当然,前提是你的项目中已经有这种字体)
// 画布组件
  useEffect(() => {
    if (
      selectedItemChange &&
      Object.keys(selectedItemChange).length &&
      selectedId
    ) {
      const index = infos.findIndex((i) => i.id === selectedId);
      const selecteditem = infos[index];
      const properties = {
        ...selecteditem,
        ...selectedItemChange,
      };
      const newInfos = [...infos];
      newInfos.splice(index, 1, properties);
      setInfo(newInfos);
    }
  }, [selectedItemChange]); // 更改选中元素的属性

  // ...
  <Stage width={width} height={height} ref={stageRef}>
        {infos.map((i: Iinfo, idx: number) => (
          <Layer key={i.id}>
          // ...
          </Layer>)}
  </Stage>
使用
  const fonts = [
    { name: 'fantasy', fontFamily: 'Fantasy' },
    { name: 'sans-serif', fontFamily: 'sans-serif' },
  ];

  // ....
 <YHSelect placeholder="请选择" onChange={changeFont}>
        {fonts.map((f) => (
          <Option value={f.fontFamily} key={f.name}>
            {f.name}
          </Option>
        ))}
      </YHSelect>
      <KonvaCanvas
        // ...
        selectedItemChange={changed}
      />
效果如下:
我的写法是,使用selectedItemChange字段来改变已选中元素的样式,你也可以设计更严谨的方式,这里不再详细说了。这一小节的主要问题是处理在线字体,也就是处理不存在本地/项目中的字体,是如何应用于画布上的。
在线字体渲染
这里的方案思考了很久,原本方案是直接让后端去生成含有所有字体的 css 文件,但觉得很不好,当用户从前端网页配置好一个新的字体后,这时服务端就要去写那个 css 文件;如果删掉一个字体,还要从 css 文件中去删么,这个思路显然不是最优解,后端不用生成这个 css 文件啊,只需要提供字体的地址和名称就可以了。
参考konva 官网文档中发现,可以用fontfaceobserver来处理字体文件的加载。当我们从后端中获取到字体数据后,就可以自己生成 css 文件了,把他插入到<head>中,然后再去调用这个 font。
那么这部分是怎么做的呢,我们先看下后端的数据
const fonts = [
    { name: 'fantasy', fontFamily: 'Fantasy' }, // 本地
    { name: 'sans-serif', fontFamily: 'sans-serif' }, // 本地
    {
        name: 'frutiger',
        fontFamily: 'frutiger',
        url: 'http://lib.mytac.cn/frutiger.ttf', // 远程,需要下载到本地
    },
    {
        name: 'Blackletter',
        fontFamily: 'Blackletter',
        url: 'http://lib.mytac.cn/Blackletter.TTF', // 远程,需要下载到本地
    },
]远程的字体文件都有url字段,当我们选中某种在线字体后,需要构造一段<style>代码,里面包含定义字体的 font-face 相关部分的代码,我们用 id 来区分不同的字体样式,这样就不会插入相同的<style>元素了。(注意:当应用元素时,第一次加载字体是异步的,这里需要加下 loading,下面的代码没有补充)
const addFontFaceToCss = (fontFamily: string, url: string) => {
    const id = 'fontStyle' + '_' + fontFamily
    const styleElement = document.getElementById(id)

    if (styleElement) {
        setChanged({ fontFamily: fontFamily })
    } else {
        const el = document.createElement('style')
        el.id = id
        const str = `
    @font-face {
      font-family: ${fontFamily};
      src: url(${url});}
    ` // 构造代码
        el.innerText = str
        document.head.append(el)
        const font = new FontFaceObserver(fontFamily)
        // 这里需要加一些loading
        font.load()
            .then(function () {
                setChanged({ fontFamily: fontFamily })
                console.log('Output Sans has loaded.')
            })
            .catch(function (err) {
                console.log(err)
                console.log('Output Sans failed to load.')
            })
    }
}
变换时字体缩放
当我们
撤销/重做
撤消重做需要我们借助循环队列来帮我们存储每一次操作的数据变更,并且只保存长度为 n 的数据,超过 N 步的操作会被自动删除。当然,最传统的头尾两个指针的循环队列不能满足要求,需要加另外一个指针 current 来表示当前的步数。
实现起来是比较复杂的,我们分步来实现。
入队、出队、判空、判满
由于我们在操作的时候,是一直不断往队列中添加操作数据,没有主动删除数据的操作,只有在队列已满时会覆盖之前的步数,所以这里不提供出队的接口。(这里的删除并不是“回退”操作,回退是保留原数据,指针往后挪了一位,进行“重做”操作时指针会前移)。
class circularQueue {
    constructor(size) {
        this.length = size
        this.front = 0
        this.tail = 0
        this.i = 0
        this.list = new Array(size)
    }

    // 入队
    enqueue(item) {
        if (this.isFull()) {
            // 满了移动头指针
            this.front = (this.front + 1) % this.length
        }
        const index = this.tail % this.length
        this.list[index] = item
        this.tail = (index + 1) % this.length
    }

    // 不涉及
    dequeue() {}

    isEmpty = () => {
        return (
            this.front === this.tail &&
            typeof this.list[this.front] === 'undefined'
        )
    }

    isFull = () => {
        return (
            this.front === this.tail &&
            typeof this.list[this.front] !== 'undefined'
        )
    } // 队列满了

    print() {
        let i = 0
        let p = this.front
        while (i < this.length) {
            console.log(this.list[p])
            p = (p + 1) % this.length
            i++
        }
    }
}
写个简单示例测试下:
const queue = new circularQ(3)

queue.enqueue(0)
queue.enqueue(1)
queue.enqueue(2)
queue.enqueue(3)
queue.enqueue(4)

queue.print()
输出
2
3
4
第三根指针————current
第三根指针 current 的用处是,用户进行回退/重做操作时,当前页面上所显示的操作的状态。但当 current 不为尾指针前驱时,在进行入队操作,就要把从 current 到队尾指针之间的所有元素清空,并且重置尾指针,
在移动指针的时候,要注意越界的问题,current 指针后移不能越过 tail、前移不能越过 front。
以下为循环队列的全部代码:
class circularQueue {
    constructor(size) {
        this.length = size
        this.front = 0
        this.tail = 0
        this.current = 0
        this.list = new Array(size)
    }

    get canMoveForward() {
        // 能否后移
        return (this.current + 1) % this.length !== this.tail
    }
    get canMoveBack() {
        // current能否回退
        return this.current !== this.front
    }

    clearAfterCurrent() {
        let i = this.current
        const length = this.length

        while ((i + 1) % length !== this.tail) {
            const clearIndex = (i + 1) % length
            this.list[clearIndex] = undefined
            i = clearIndex
        }
        this.tail = (this.current + 1) % this.length
    }

    // 入队
    enqueue(item) {
        // 当入队时current不是处于队尾指针的前驱时,需要清空current到队尾之间的所有元素,并重置尾指针
        if (this.isFull() && (this.current + 1) % this.length !== this.tail) {
            this.clearAfterCurrent()
        }

        if (this.isFull()) {
            this.tail = (this.current + 1) % this.length
            // 满了移动头指针
            this.front = (this.front + 1) % this.length
        }
        this.list[this.tail] = item
        this.current = this.tail
        this.tail = (this.tail + 1) % this.length
    }

    // 不涉及
    dequeue() {}

    isEmpty = () => {
        return typeof this.list[this.front] === 'undefined'
    }

    isFull = () => {
        return (
            this.front === this.tail &&
            typeof this.list[this.front] !== 'undefined'
        )
    } // 队列满了

    getCurrent() {
        console.log('getCurrent', this.list[this.current])
        return this.list[this.current]
    }

    // 往右移一步 (尾指针方向)
    moveForward() {
        if (this.canMoveForward) {
            this.current = this.isFull()
                ? (this.current - 1 + this.length) % this.length
                : this.current + 1
        }
    }
    // 往左移一步 (头指针方向)
    moveBack() {
        if (this.canMoveBack) {
            this.current = this.isFull()
                ? (this.current - 1 + this.length) % this.length
                : this.current - 1
        }
    }

    print() {
        let i = 0
        let p = this.front
        while (i < this.length) {
            console.log(this.list[p])
            p = (p + 1) % this.length
            i++
        }
    }
}
我们把 circularQueue 与画布上的 infos 绑定起来,最终效果如下:
数据绑定
使用上面的代码绑定到视图层后,发现当操作一步之后,再点击“撤回”无法撤回
最终效果如下
这是因为视图层的 state 为 circularQueue 的一个实例,每次改变时,react 不能捕获到他的数据变更,因此我们必须把 current 绑定到 state 上,这里不详述了,这个系列结束后会给出源代码。
元素缩放时撤回/重做失效

正当我因为把撤回重做功能测试通过而暗自窃喜时,在拖动选择框大小时却发现,每次撤回时是按帧撤回的,而不是把最后一次缩放的操作放入循环列表中。进入Transformer中瞧瞧:
<Transformer
    ref={trRef}
    boundBoxFunc={(oldBox, newBox) => {
        // limit resize
        if (newBox.width < 5 || newBox.height < 5) {
            return oldBox
        }
        console.log('changedbox') // 打印一下
        handleInfo(newBox)
        return newBox
    }}
/>
发现控制台竟然打印了 100 多次“changedbox” Σ(っ °Д °;)っ
一想就知道boundBoxFunc是连续触发的,所以这里把每一帧的变化都传给了循环队列。本人那么多年经验的工程师可不是吃 hello world 长大的!!(●’◡’●) 这里用防抖函数debounce包裹一下,
const debounceHandleInfo = debounce((newBox) => {
    trRef.current.forceUpdate()
    handleInfo(newBox)
}, 100)

const boundBoxFunc = (oldBox: any, newBox: any) => {
    if (newBox.width < 5 || newBox.height < 5) {
        return oldBox
    }
    debounceHandleInfo(newBox)
    return newBox
}

// ...

return <Transformer ref={trRef} boundBoxFunc={boundBoxFunc} />
运行:
woc!!(╯▔ 皿 ▔)╯ 为什么事情的发展和我想象中的不一样!Transformer 包裹的元素怎么会发生畸(ji)变?konva 内部一定是自己做了什么”见不得光”的事情,摔,去翻 api 文档…、
试了onDragEnd、isTransforming都差强人意,翻遍 github issue 和 stackoverflow 都没有,正当我绝望时,把鼠标挪到Transformer那行代码上,输了一个on,发现了神迹:onTransformEnd。
<Transformer
    ref={trRef}
    boundBoxFunc={boundBoxFunc}
    onTransformEnd={(a) => {
        console.log('end', a)
    }}
/>
打印一下康康:
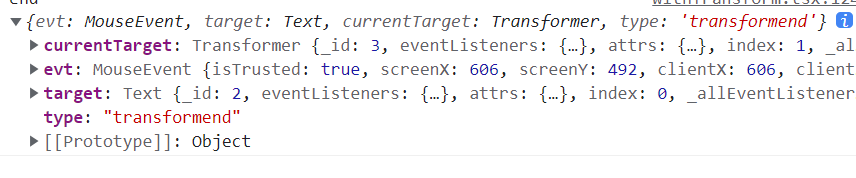
发现内部target.attrs正是我们需要的包裹元素的属性!
赶紧给他传入循环队列中!
<Transformer
    // ...
    onTransformEnd={(a) => {
        handleInfo(a.target.attrs)
    }}
/>
wor! ε=( o ` ω′)ノ 图片倒是对了,怎么文本元素撤回时文本没了啊?
在逐层去看a.target.attrs中并没有什么奇奇怪怪的属性,但不清楚内部是不是会触发些什么 bug,我们只能把需要的属性择出来:
<Transformer
    // ...
    onTransformEnd={(a) => {
        const { scaleX, scaleY, rotation, skewX, skewY, x, y } = a.target.attrs
        handleInfo({ scaleX, scaleY, rotation, skewX, skewY, x, y })
    }}
/>
这部分终于结束了,明天更新处理图层相关的操作,敬请期待!
图层
konva 上图层的顺序其实就是 Layer 的渲染顺序,如下,layer3 就是最上层的,layer1 是最下层的。
<Stage>
    <Layer1 />
    <Layer2 />
    <Layer3 />
</Stage>
我们移动上下图层就是改变 info 中每个图层的 index 值.交换当前图层与目标图层的 index
// i正数往上移动,负数往下移动
Shape.moveLayer = (i: number) => {
    const current = [...steps]
    const currentLayerIndex = current.findIndex((c) => c.id === selectedId)
    let isChanged = false
    if (currentLayerIndex >= 0) {
        const tmp = current[currentLayerIndex]

        if (i > 0) {
            if (currentLayerIndex < current.length - 1) {
                // 界限
                current[currentLayerIndex] = current[currentLayerIndex + 1]
                current[currentLayerIndex + 1] = tmp
                isChanged = true
            }
        } else if (i < 0) {
            if (currentLayerIndex > 0) {
                // 界限
                current[currentLayerIndex] = current[currentLayerIndex - 1]
                current[currentLayerIndex - 1] = tmp
                isChanged = true
            }
        }
    }
    if (isChanged) {
        stepCached.enqueue(current) // 本地数据更改
        setSteps(stepCached.getCurrent()) // 绑定state
    }
}
我们可以看到图层虽然可以正常移动,但是图层移动之后添加文字元素,图层的选中态有问题,看看咋回事。
打印 selectedId 发现,当移动图层后再生成新元素时,新元素的 id 没有递增,查看下生成新元素的代码
// 添加新元素时
const onAdd = (item: IaddItem) => {
    const infos = stepCached.getCurrent()
    const newItem = { ...item, id: 0 }
    const lastInfo = infos[infos.length - 1] // !!!!
    const newId = lastInfo ? lastInfo.id + 1 : 1000
    newItem.id = newId
    const list = [...infos, newItem]
    stepCached.enqueue(list)
    setSteps(stepCached.getCurrent())
    setSelected(newId)
}
发现新元素的 id:newId 是当前 info 数组最后一个元素+1 生成的,这里显然是不太严谨的,应该是当前数组中 id 最大元素+1,这里修改为
const onAdd = (item: IaddItem) => {
    const infos = stepCached.getCurrent()
    const newItem = { ...item, id: 0 }
    const maxId = infos.reduce((prev, info) => Math.max(info.id, prev), 0) // 注意!
    const newId = maxId ? maxId + 1 : 1000
    newItem.id = newId
    const list = [...infos, newItem]
    stepCached.enqueue(list)
    setSteps(stepCached.getCurrent())
    setSelected(newId)
}
最终效果如下
缩放画布
因为我们产品只要求画布中心点缩放,并没有以鼠标为中心进行缩放的功能,就比较简单,直接改变 css transform 属性就 ok 了。
const [stageScale, setStageScale] = useState(1)

// ...
Shape.canvasScale = (ratio = number) => {
    // ratio属于[0.25,2]
    // 获取画布中心的位置
    if (ratio <= 2 && ratio >= 0.25) {
        setStageScale(ratio)
    }
}

return (
    <Stage
        // ....
        style={{ backgroundColor: '#fff', transform: `scale(${stageScale})` }}
    ></Stage>
)
删除元素
删除元素非常好理解,就是删除一个 info 中的所选中的元素。
// 删除选中元素
Shape.deleteItem = () => {
    const info = [...steps]

    const index = info.findIndex((i) => i.id === selectedId)
    if (index >= 0) {
        info.splice(index, 1)
        stepCached.enqueue(info)
        setSteps(stepCached.getCurrent())
    }
}
效果如下:
用户交互
获取元素形变后的宽高
当我们像下面这样拖动元素大小的时候
无法获取当前被拖动元素的宽高, attrs 中的 textWidth 没有变化:
但是我们仔细观察可以发现有两个属性改变了scaleX``scaleY,原来 konva 没有帮我们计算元素的宽高,只是记录了形变的倍数。那么在交互面板上,用户自己输入宽高,我们怎么转换呢?
文本元素
width=fontSize*text.length*scaleX

height=fontSize*行数*scaleY

行数=text.filter(t=>t==='\n').length
然而上面原理是对的,如下,但如下图,我的画布只有 375px,他看起来只占画布宽度的一半却显示元素的宽度有 333px,这显然是不对的。

可能是因为字号虽然固定,但每个字的宽度是不一样的,接着看 konva 内部有两个属性textWidth, textHeight,我们直接用这两个属性乘上 scale 试试:
 onTransformEnd={(a) => {
            const { attrs, textWidth, textHeight } = a.target;
            const { scaleX, scaleY, rotation, skewX, skewY, x, y, type } =
              attrs;
            const otherProperty: any = {};
            if (type === 'text') {
              const w = textWidth * scaleX;
              const h = textHeight * scaleY;
              otherProperty.w = w;
              otherProperty.h = h;
            }

            handleInfo({
              scaleX,
              scaleY,
              rotation,
              skewX,
              skewY,
              x,
              y,
              ...otherProperty,
            });
          }}
为了测试结果准确性,我把当前元素拉至画布大小,结果近似于画布宽度,说明这个公式成立!
所以反推,当用户输入宽度/高度,我们就可以直接算出 scaleX、scaleY,在把这两个值绑定到 step 中。
改变文本颜色
使用react-color作为取色器,在使用的过程中,发现不能拖动透明度的拖拽条,查找 github issue,发现是因为初始化的时候,给 color state 设初值是#000,应该给其带上透明度
import { FC, useState } from 'react'
import { ChromePicker } from 'react-color'
import { Wrapper, ColorBlockWrapper } from './style'

const decimalToHex = (alpha: number) =>
    alpha === 0 ? '00' : Math.round(255 * alpha).toString(16)

const FontColor: FC<{
    color: string
    changeColor: (a: any) => void
}> = ({ color = '#000', changeColor }) => {
    const [visible, setVisible] = useState(false)
    const [acolor, setColor] = useState('#000000ff')
    return (
        <Wrapper>
            <div className="title">文本颜色</div>
            <div>
                <YHInput
                    type="text"
                    value={acolor.slice(0, -2)}
                    addonAfter={
                        <ColorBlockWrapper
                            onClick={setVisible.bind(null, true)}
                            style={{ backgroundColor: acolor }}
                        ></ColorBlockWrapper>
                    }
                />
                {visible && (
                    <ChromePicker
                        color={acolor}
                        onChange={(c) => {
                            const hexCode = `${c.hex}${decimalToHex(c.rgb.a)}`
                            setColor(hexCode)
                        }}
                    />
                )}
            </div>
        </Wrapper>
    )
}
效果如下:
但我发现,使用ChromePicker没有确认取色这一按钮,只有PhotoshopPicker有,但是PhotoshopPicker长这样…
与主题不太配套,所以还是用 chrome 的吧。至于,确认事件,只要加个监听就好,当点击事件在取色框外部时,就发送确认事件给上层。
const hideListener = (e: Event) => {
    if (ref && visible) {
        const ele = e.target
        const validArea = ref.current
        if (!validArea.contains(ele)) {
            setVisible(false)
            changeColor({ color: acolor }) // 已经发送为啥木有生效?
        }
    }
}

useEffect(() => {
    document.addEventListener('click', hideListener)
    return () => {
        document.removeEventListener('click', hideListener)
    }
}, [visible])但把数据发给上层,并没有使画布更新,改一下字体颜色的属性值为fill
可以同步到渲染到画布上了,但这里有个问题是,用户如果频繁的改变颜色,撤回/重做的时候只会退回到上一个颜色,而不是退回到其他操作,所以我们在前几章编写的‘入队’事件就要修改一下。
默认是更改一步操作,即进行入队;这里加一个参数,如果有该参数,则只是修改当前的 current 指针所指的元素的属性,不进行入队操作,但要清空当前 current 指针之后的元素。
if (properties._ignore === true) {
    // 不入队,替换当前指针所指元素,并清空current之后的对内元素
    delete properties._ignore
    const ins = [...infos]
    ins[index] = properties
    stepCached.list[stepCached.current] = ins
    stepCached.clearAfterCurrent()
} else {
    const newInfos = [...infos]
    newInfos[index] = properties
    stepCached.enqueue(newInfos)
}
效果如下
虽然忽略了一些操作,但是为什么撤回为什么撤了两步才回到上一步操作?
这是因为我们改变了当前 current 元素,存储的 A 颜色;而在离开当前取色器时又存了一次,所以在上一步监听器中,把发送事件删掉就 ok 了!

大功告成!
改变字体加粗斜体样式
我们上文中提过字体的加粗和斜体的展示,通过修改fontStyle这个属性就可以实现;给字体加下划线是改变textDecoration这个属性,代码如下:
const TextStyle: FC<{
    fontStyle: string
    textDecoration: string
    onChangeFontStyle: (a: any) => void
}> = ({
    fontStyle = '',
    textDecoration = '',
    onChangeFontStyle = () => {},
}) => {
    const isBold = fontStyle.includes('bold')
    const isUnderline = textDecoration.includes('underline')
    const isItalic = fontStyle.includes('italic')

    const onChange = (key: string, isExsit: boolean) => {
        const isDecor = key === 'underline'
        let s: string = isDecor ? textDecoration : fontStyle

        if (isExsit) {
            // 存在就删除
            const reg = new RegExp(key)
            s = s.replace(reg, '')
        } else {
            // 不存在就加上
            s += ' ' + key
        }
        onChangeFontStyle({ [isDecor ? 'textDecoration' : 'fontStyle']: s })
    }

    return (
        <Wrapper>
            <div className="title">文本样式</div>
            <div className="fontStyler">
                <div
                    className={`button1${isBold ? ' selected' : ''}`}
                    onClick={onChange.bind(null, 'bold', isBold)}
                >
                    <BoldOutlined />
                </div>
                <div
                    className={`button1${isUnderline ? ' selected' : ''}`}
                    onClick={onChange.bind(null, 'underline', isUnderline)}
                >
                    <UnderlineOutlined />
                </div>
                <div
                    className={`button1${isItalic ? ' selected' : ''}`}
                    onClick={onChange.bind(null, 'italic', isItalic)}
                >
                    <ItalicOutlined />
                </div>
            </div>
        </Wrapper>
    )
}
效果如下
修改字体的对齐方式
在 konva 中字体的对齐方式的属性是align,值为:left、center、right。控件的实现方式与上一段类似,只是多选与单选的区别。
const TextAlign: FC<{
    textAlign: string
    onChangeTextAlign: (a: any) => void
}> = ({ textAlign = 'left', onChangeTextAlign = () => {} }) => {
    const onChange = (align: string) => {
        onChangeTextAlign({ align })
    }

    return (
        <Wrapper>
            <div className="title">对齐方式</div>
            <div className="fontStyler">
                <div
                    className={`button1${
                        textAlign === 'left' ? ' selected' : ''
                    }`}
                    onClick={onChange.bind(null, 'left')}
                >
                    <AlignLeftOutlined />
                </div>
                <div
                    className={`button1${
                        textAlign === 'center' ? ' selected' : ''
                    }`}
                    onClick={onChange.bind(null, 'center')}
                >
                    <AlignCenterOutlined />
                </div>
                <div
                    className={`button1${
                        textAlign === 'right' ? ' selected' : ''
                    }`}
                    onClick={onChange.bind(null, 'right')}
                >
                    <AlignRightOutlined />
                </div>
            </div>
        </Wrapper>
    )
}
效果如下:

字体的透明度调节
这里使用antd的 slider 对其进行控制,注意要用 1 减去当前滑动条的值。这里注意用 debounce 去封装一下 onChange 事件的函数,避免高频更改。
const OpacitySlider: FC<{
    opacity: number
    onChangeOpacity: (a: any) => void
}> = ({ opacity = 0, onChangeOpacity = () => {} }) => {
    const [inputvalue, setInputValue] = useState(0)

    const confirmInput = (alpha: any) => {
        onChangeOpacity({ opacity: 1 - alpha / 100 })
    }

    const debounceConfirm = useCallback(debounce(confirmInput, 500), []) // 注意这里

    const onChangeSlide = (e: number) => {
        setInputValue(e)
        debounceConfirm(e)
    }

    useEffect(() => {
        setInputValue(Math.round((1 - opacity) * 100)) // opacity是0-1的小数
    }, [opacity])

    return (
        <Wrapper>
            <div className="title">透明度</div>
            <div className="slider">
                <YHSlider
                    min={0}
                    max={100}
                    onChange={onChangeSlide}
                    value={inputvalue}
                    step={1}
                />

                <YHInput
                    max={100}
                    min={0}
                    step={1}
                    type="number"
                    value={inputvalue}
                    suffix="%"
                    //@ts-ignore
                    onChange={(e) => onChangeSlide(e.target.value)}
                />
            </div>
        </Wrapper>
    )
}
效果如下

旋转角度
实现方式与调节透明度几乎一致,改下参数和最值大小就 ok 了
const RotationSlider: FC<{
    rotation: number
    onChangeRotation: (a: any) => void
}> = ({ rotation = 0, onChangeRotation = () => {} }) => {
    const [inputvalue, setInputValue] = useState(0)

    const confirmInput = (deg: any) => {
        onChangeRotation({ rotation: Math.round(deg) })
    }

    // eslint-disable-next-line react-hooks/exhaustive-deps
    const debounceConfirm = useCallback(debounce(confirmInput, 300), [])

    const onChangeSlide = (e: number) => {
        setInputValue(e)
        debounceConfirm(e)
    }

    useEffect(() => {
        setInputValue(Math.round(rotation))
    }, [rotation])

    return (
        <Wrapper>
            <div className="title">旋转角度</div>
            <div className="slider">
                <YHSlider
                    min={-180}
                    max={180}
                    onChange={onChangeSlide}
                    value={inputvalue}
                    step={1}
                />

                <YHInput
                    min={-180}
                    max={180}
                    step={1}
                    type="number"
                    value={inputvalue}
                    suffix="°"
                    //@ts-ignore
                    onChange={(e) => onChangeSlide(e.target.value)}
                />
            </div>
        </Wrapper>
    )
}
效果如下

旋转中心
如上图所示,元素的旋转并没有和我们设想的那样,随着元素的中心点旋转,而是围绕元素的左上角旋转(也就是 x、y)的位置,x、y 并没有变化。
查看官方文档 How to set rotation point of a shape?
需要我们自行计算旋转后的 x、y 值,我们改造下官方代码
const handleRotation = (rot: number) => {
    const topLeft = {
        x: -currentRef.width() / 2,
        y: -currentRef.height() / 2,
    }
    const current = rotatePoint(topLeft, Konva.getAngle(currentRef.rotation()))
    const rotated = rotatePoint(topLeft, Konva.getAngle(rot))
    const dx = rotated.x - current.x,
        dy = rotated.y - current.y

    const newItem = {
        rotation: Math.round(rot),
        x: currentRef.x() + dx,
        y: currentRef.y() + dy,
    }

    return newItem
}

const confirmInput = (deg: any) => {
    const item = handleRotation(deg)
    onChangeRotation(item)
}
最终效果如图

大功告成,下章见!
镜像翻转
水平翻转/垂直翻转
如果是水平翻转,scaleX就为-1*scaleX,scaleY不变;相对的,垂直翻转就是,scaleY就为-1*scaleY,scaleX不变
const onReverse = (type: string) => {
    let scale = { x: scaleX, y: scaleY }

    if (type === 'horizontal') {
        scale.x = scaleX * -1
    } else {
        scale.y = scaleY * -1
    }
    onChangeScale({ scale })
}
但经过翻转后我们发现,虽然图像正常翻转了,但位置变了,这是因为图像是按照左上角为基点进行变换的,这时我们就要改变当前元素的 offset(How to flip shapes or image on canvas?)。
当水平翻转时,offsetX 为当前 offsetX+当前元素的宽度,同理,垂直翻转时,offsetY 为当前 offsetY+当前元素的高度
const onReverse = (type: string, isSelected: boolean) => {
    let scale = { scaleX: scaleX, scaleY: scaleY }
    let offset = {}

    if (type === 'horizontal') {
        scale.scaleX = scaleX * -1

        offset = {
            offsetX: isSelected
                ? offsetX + currentRef.width()
                : offsetX - currentRef.width(),
        }
    } else {
        scale.scaleY = scaleY * -1
        offset = {
            offsetY: isSelected
                ? offsetY + currentRef.height()
                : offsetY - currentRef.height(),
        }
    }
    onChangeScale({ ...scale, ...offset })
}